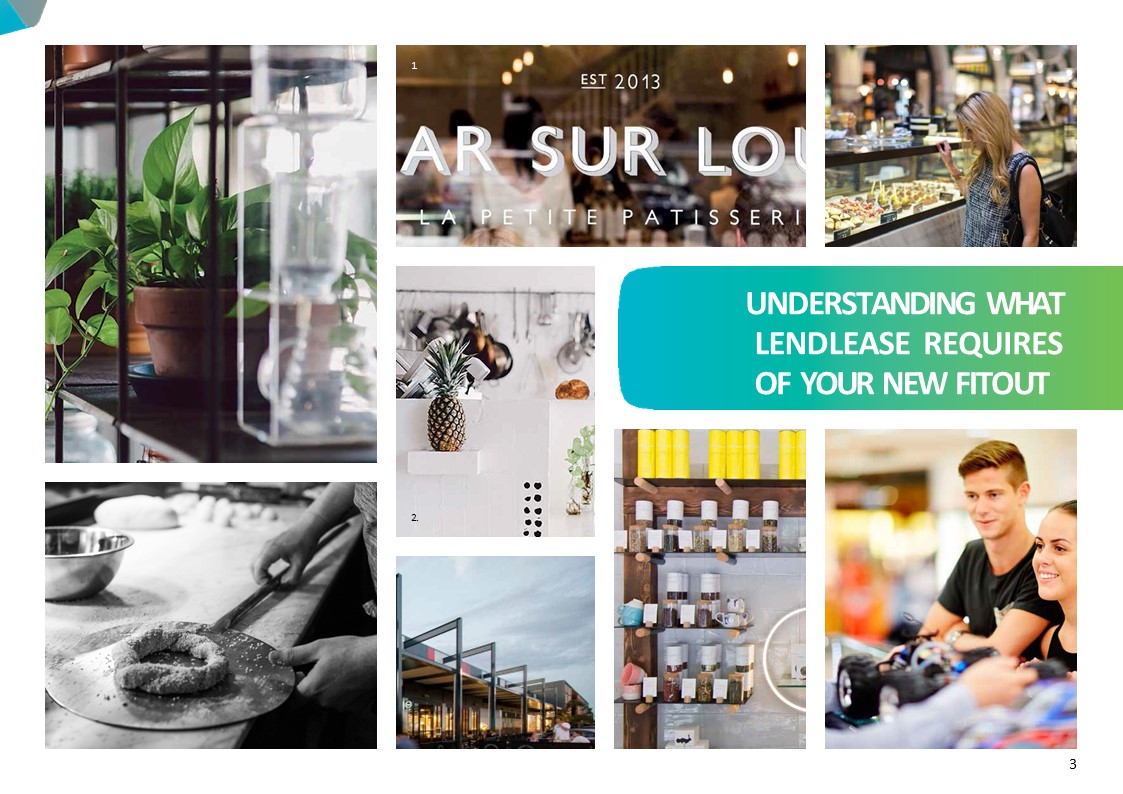
Complete Lendlease Retail Fitout Guide: Ensuring Compliance & Design Excellence
Navigating the fitout requirements of a major shopping centre can be complex. This comprehensive guide breaks down the official Lendlease Operational Fitout Guide, providing retailers and designers with a clear roadmap to compliance, sustainability, and successful store opening.
About the Lendlease Fitout Guide
This guide is designed to help retailers and designers understand the requirements for constructing a fitout within a Lend Lease shopping centre. It is essential reading whether you are building a new fitout or refurbishing an existing one.
Lend Lease is committed to sustainable operations, and this guide outlines specific sustainability requirements. In some cases, it must be read alongside a Site Specific Fitout Guide.
Key Points:
- Ensure all your representatives—consultants and contractors—understand and action the requirements.
- The guide should be read in conjunction with your Agreement for Leaseand/or Lease documentation.
- In case of inconsistency, the terms of the Lease or Agreement for Lease will prevail.
The Lendlease Fitout Process & Key Contacts
Who You Will Work With:
- Retail Design Manager (RDM):Your point of contact for design approval. They review submissions and provide approvals, liaising primarily with you and your Retail Designer.
- Operations Manager:Manages the construction and authority approval process, liaising with you and your Shopfitter.
- Retail Tenancy Coordinator (RTC):Assists in ensuring your fitout is delivered on time, coordinating with all parties.
Simple Steps to Complete Your Fitout
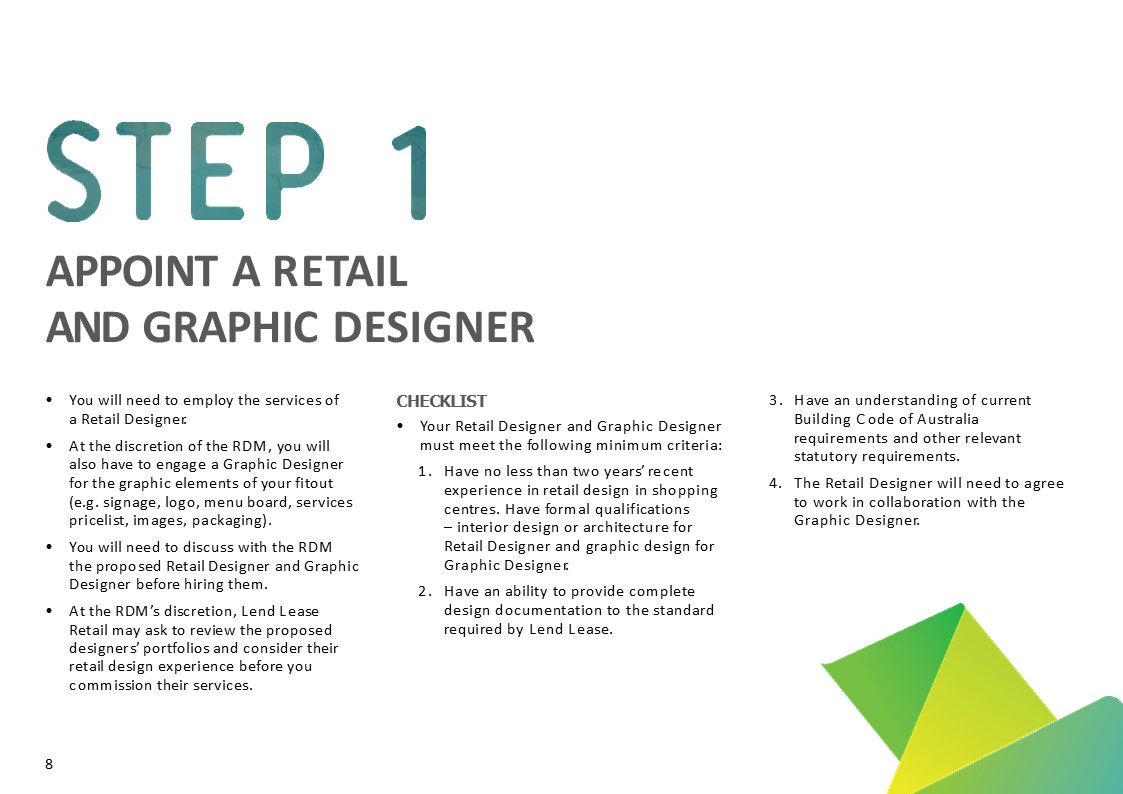
Step 1: Appoint a Retail and Graphic Designer
- You must employ a Retail Designer.
- A Graphic Designermay also be required for elements like signage, logos, and menu boards.
- Proposed designers must be discussed with the RDM, who may review their portfolios.
- Designer Minimum Criteria:
- Minimum two years of recent retail design experience in shopping centres.
- Formal qualifications in interior design/architecture (Retail Designer) or graphic design (Graphic Designer).
- Ability to provide complete design documentation to Lend Lease’s standard.
- Understanding of the Building Code of Australia and other statutory requirements.
- Willingness to collaborate with the Graphic Designer.
Step 2: Initial Briefing
After appointing your Retail Designer, a briefing is held with the RDM.
- Topics Covered:This guide, Site Specific Guide, program milestones, tenancy drawings, shopfitter status, authority approvals, and the Services and Sustainability Checklist.
- Action:Agree on program milestones and confirm the authority approval process with relevant statutory bodies.
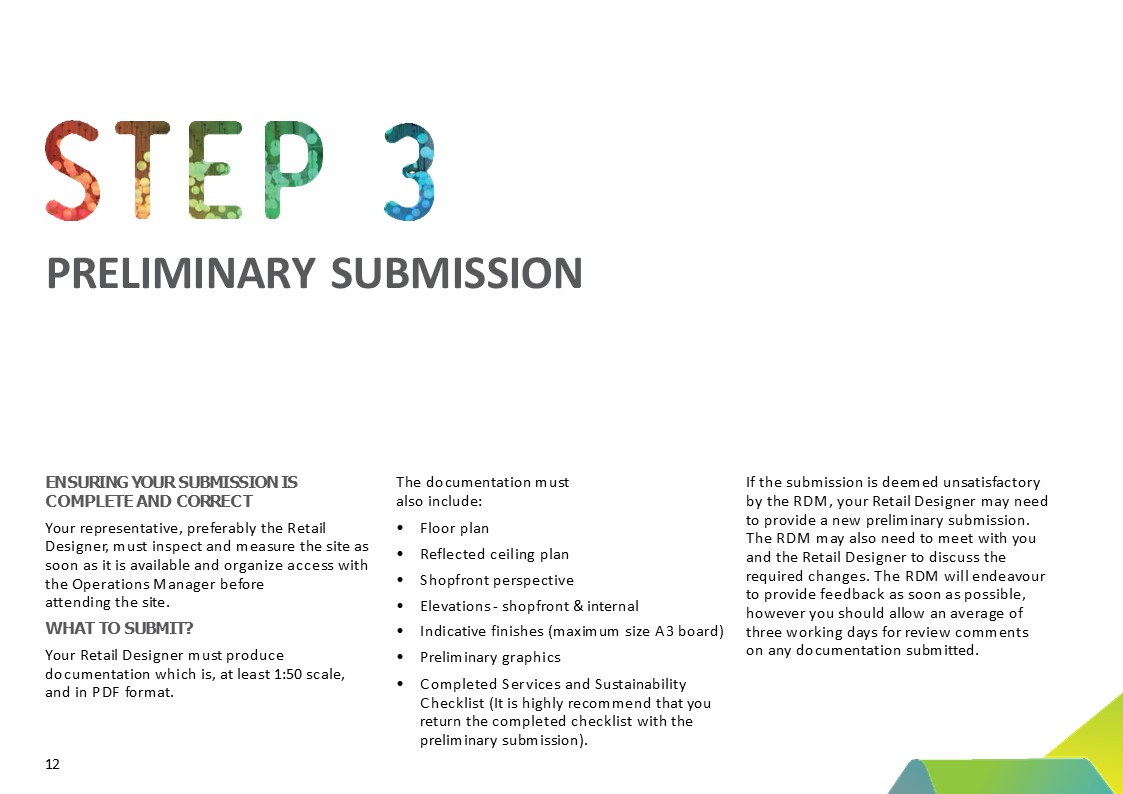
Step 3: Preliminary Submission
- The Retail Designer must inspect and measure the site.
- Submission Requirements (PDF, min 1:50 scale):
- Floor plan
- Reflected ceiling plan
- Shopfront perspective
- Elevations (shopfront & internal)
- Indicative finishes board (max A3)
- Preliminary graphics
- Completed Services and Sustainability Checklist
- Allow an average of three working daysfor RDM review.
Step 4: Final Drawing Submission and Approval
Incorporate feedback from the RDM and statutory bodies.
- Submission Requirements (PDF, scaled appropriately):
- Detailed floor plans (hydraulic, electrical, set out, finishes)
- Reflected ceiling plan (heights, lighting, access panels)
- Shopfront elevation and sections (including surrounding mall architecture)
- Internal elevations
- Joinery and fixture details
- Signage details
- Finishes board and schedule
- Specifications/photos of proprietary items
- Finalized graphics package
- Completed Services and Sustainability Checklist
- Structural certification for shopfront (from a certified structural engineer)
- Final Design Approval Conditions:
- Valid for 6 months.
- Fitout must be built as per approved drawings.
- Approval is for ‘DESIGN INTENT ONLY’and does not confirm statutory compliance.
- Tenant is responsible for all statutory approvals and compliance.
- No works can commence without Final Design Approval and an approved Services and Sustainability Checklist.
Step 5: Authority Approval
- The RDM provides Owner’s Consentletters for statutory submissions.
- Tenant must obtain and pay for all statutory approvals (building permits, licenses, occupation certificates, etc.) before starting on-site works or opening.
- Applications may need to be submitted prior to Final Design Approval to meet timelines.
Step 6: Shopfitter
- Tenant is responsible for appointing a Shopfitter.
- Provide the Shopfitter with this Fitout Guide, Centre House Rules, and Contractor Induction Pack.
- Ensure the Shopfitter can meet the programmed opening date.

Step 7: Pre-Construction Meeting / Checklist
Before work starts, a pre-construction meeting is held on-site with the tenant, Shopfitter, and centre operations.
- Pre-Construction Checklist Requirements:
- Valid insurance certificates (Public Liability, Contractors All Risk, Workers Compensation, etc.)
- Completed Centre House Rules and Induction
- Construction program
- Final Design Approval drawings on site
- Damage Deposit paid ($2,000)
- Statutory Authority Approvals
- Engineer’s certifications
- Waste recycling strategy

Step 8: Fitout Period
- During Fitout:All parties must abide by Centre House Rules. Lend Lease will conduct site inspections.
- Prior to Trading:An Application for Authority to Trade is required. The Operations Manager will inspect the fitout. Hoarding is only removed after Authority to Trade is granted.
- After Opening:A defects notice will be issued. Defects must be rectified within 14 days. The Damage Deposit is returned after defects and any centre damage are rectified.
Design and Construction Guidelines
General Retail Shopfronts
- Opening/Entry:Cannot be completely open. ~40% should be fixed glazing.
- Outgo:Limited to 50% of shopfront; must not interfere with mall services.
- Doors:Must be concealed during trading hours; tracks/hinges must be recessed. Swing doors must open inwards.
- Finishes:High-quality and durable. Skirting (first 200mm) must be heavy-duty (e.g., stone, vitrified tile).
- Glazing:Must appear frameless; channels recessed.
- Signage:Typically one sign per tenancy. Must be 3D and illuminated. Letters typically not higher than 400mm. No exposed light boxes, flashing, or animated signs.
- Sustainability:Use sustainable materials (AFS/FSC certified timber, low-VOC, recycled content).

Kiosk-Specific Guidelines
- Heights:No items other than signage above 1400mm from mall floor level.
- Signage:One pylon sign (max 2400H x 700W x 150D). Food kiosks allowed two pylons.
- Finishes:High quality; standard paint not approved. Laminates generally not permitted.
- Lighting:Task lighting must be integrated into the counter front.
- Music/Noise:Not permitted.
- Exhaust:Typically not permitted; “In Bench” recirculating style may be considered.
Key Compliance Areas
- Walls:No exposed blockwork in customer areas.
- Ceilings:Must be securely fixed to building structure only.
- Lighting:Energy efficient (e.g., T5 fluorescents, LEDs). Timers required for non-essential lighting.
- Flooring:High quality, durable, and flush with mall finish. Proper slip resistance required.
- Waterproofing:Required for food tenancies; must include certification and warranty.
- Equipment:Must be energy and water efficient (highest star ratings). No visible supplier branding.
- Music/Noise:Decibel rating must not exceed 75 dB. Speakers must be recessed; kiosks cannot have sound systems.
- Sustainability:A minimum of five sustainable materials must be used and declared.

Lessor & Lessee Works: Who Pays for What?
This section clearly outlines responsibility for costs. Key takeaways:
- Lessor Typically Provides:Base building structure, existing slab, inter-tenancy walls in base state, existing mall ceiling (for kiosks), base air conditioning supply, existing fire services, and base electrical supply.
- Lessee Typically Pays For:All fitout works, floor preparation and finishes, wall linings and cladding, all ceilings (inline tenancies), lighting, alterations to services, hydraulic/gas/telephone/data reticulation, exhaust systems, rubbish removal, hoarding, and all certifications.
Designing for Dignity & Sustainability
Lend Lease emphasizes inclusive design and environmental responsibility.
- Dignity:Ensure equitable access for all customers, including those with mobility conditions. Consider automatic doors, wide aisles, and lowered counter sections.
- Sustainability:Use green power, energy/water-efficient equipment, and sustainable materials. Participate in centre waste reduction initiatives.
Need Expert Guidance on Your Lendlease Fitout?
Navigating these requirements can be daunting. M2 Display has extensive experience designing and building retail fitouts that are fully compliant with Lendlease and other major shopping centre standards. Contact us today to ensure your project is approved on time and built to the highest standards.