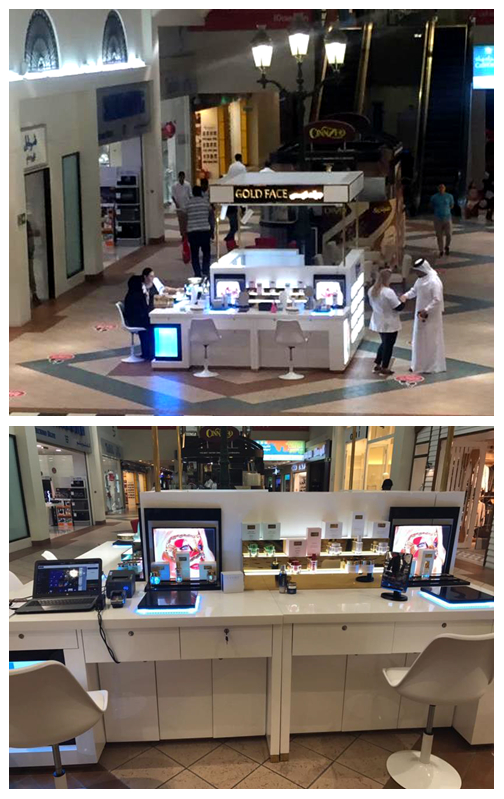
This guide walks you through the installation process of a 3x3m Gold-Top Skincare Kiosk, specially customized and produced by M2 Display for our valued client in Doha, Qatar .
With its elegant white-and-gold color scheme, soft warm lighting, and integrated elements — including spotlight display cabinets, illuminated lightboxes, logo signage, and a built-in reception counter — this kiosk delivers both functionality and a high-end shopping experience.
As part of M2 Display’s all-in-one solution, we provided everything from initial design to production, global shipping, and professional installation support. Now that the kiosk has successfully arrived on-site, follow this simple step-by-step guide to complete the setup.
Let’s begin the installation and bring your stunning skincare kiosk to life.
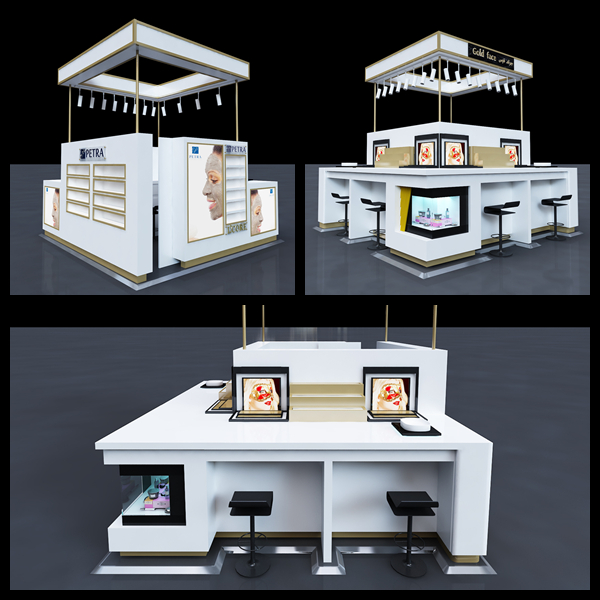
3D Design
Step 1: Unpack & Inventory Check
Carefully open all crates and packages, then check each component against the packing list to ensure all panels, counters, lightboxes, logos, roof and accessories are included.

Step 2: Position the Base Units
Place the reception counter, cabinet bases, and main floor units according to the layout plan. Ensure corners and kiosk boundaries align with the 3x3m floor space.
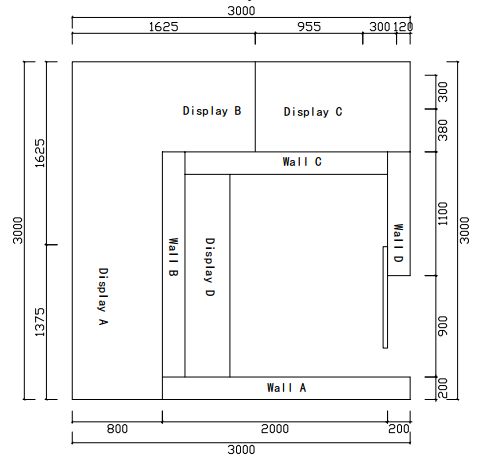
Step 3: Outside Display installation
Put the display A/B/C in the right location, see plan above.
1.Remember to connect wire, see photo 1 below.
2.For display B, till counter — all the keys are in the till counter drawer. The cube is packed in the right cabinet
3.Please open this panel below to put the wood cube.
1.Remember to connect wire, see photo 1 below.
2.For display B, till counter — all the keys are in the till counter drawer. The cube is packed in the right cabinet
3.Please open this panel below to put the wood cube.

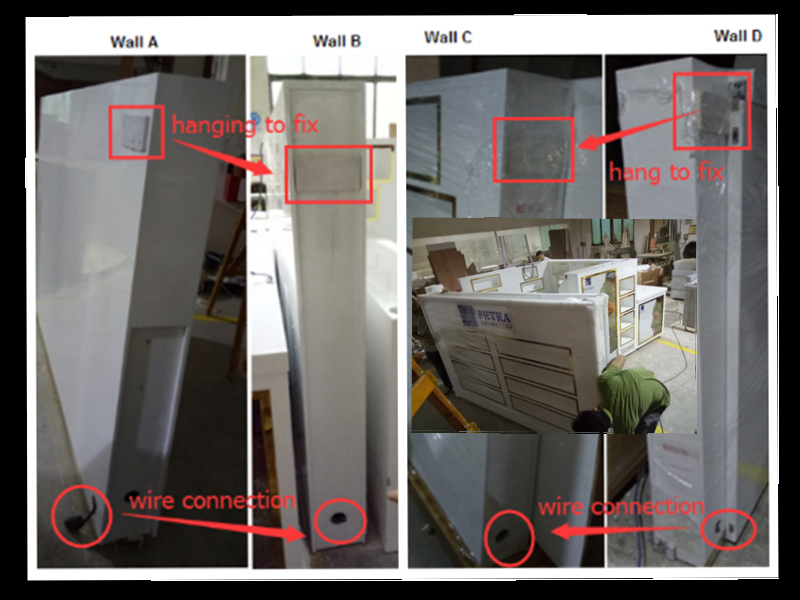
Step 4: House installation
Wall connection: A – B – C – D. need 4 people to do it. See video for more details.
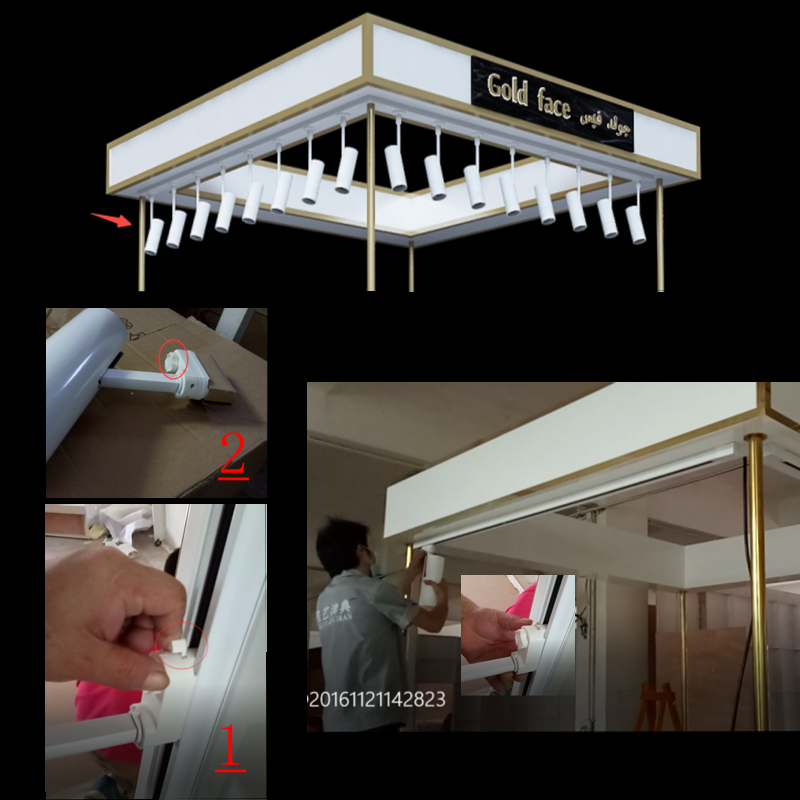
Stept 5: Roof Insatllation
It needs 8 people to move the roof on the top of the wall.
1. Put 2 pillars at wall C, remember to put wire through the pillar.
2. When roof arrives at the top, put another 2 pillars in the wall A.
Put pillars into both roof & wall holes and make sure they are flat.
(Remember to get the wire from pillar to roof)
3.Screw both roof & wall.
1. Put 2 pillars at wall C, remember to put wire through the pillar.
2. When roof arrives at the top, put another 2 pillars in the wall A.
Put pillars into both roof & wall holes and make sure they are flat.
(Remember to get the wire from pillar to roof)
3.Screw both roof & wall.

Step 6: Spotling Installation
1.Put it into the track and lock the spotlight (switch location in red circle)
2.After you find the right location, turn the round button below to fix the lighting.
3.If you want to remove them, it is the same. Please switch to the right place before remove, or it may hurt the spotlight.
2.After you find the right location, turn the round button below to fix the lighting.
3.If you want to remove them, it is the same. Please switch to the right place before remove, or it may hurt the spotlight.
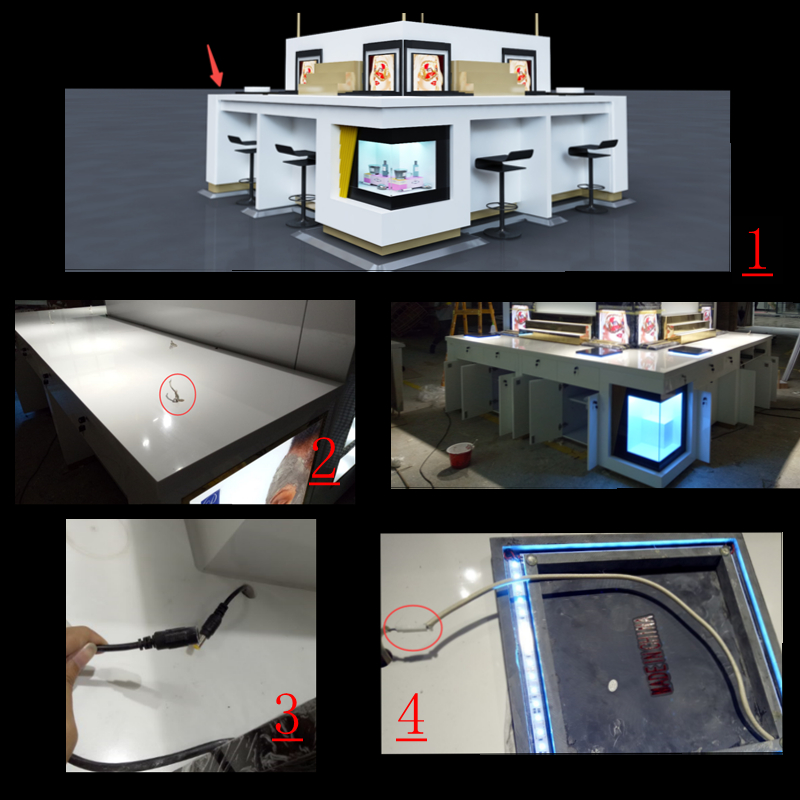
Step 7: Counter Top installation
1.Put units at right location
2.Those wires from holes for connecting display units. Not let it down the hole, or headache comes.
3.Acrylic display units connection.
4.Black marble & step units connection.
Acrylic Display Units Change
Open the screw at the back, then change image.
Open the screw at the back, then change image.
Step 8: Lightbox image installation
Please ask a man to change the image
1. open from bottom
2.open the top. Please be careful and note the painting.
Remove the glue to remove the previous image, and change a new one, then use adhesive tape to fix.

Opening Day